How to Stop Using Microsoft Account to Login to Atlassian
If you are logging into Atlassian with your Microsoft/Google account and want to set a password you need to unlink it. To do so you need to change your email...
Jupyter Lab notebooks are a great tool for doing data analysis that is either to big for Excel, or you need to repeat the output. Google Colab is a hosted version of Jupyter Labs. A useful feature of Jupyter Notebooks are that you can share a notebook with someone and they can see the same output. Google Colab adds the extra bonus of allowing you to share your instance of the notebook directly with anyone who has a Google Account, or corporate Google Apps Account. These sharing features also extend to accessing data directly from Google Drive using Google’s colab library.
If you are collaborating with a user who you don’t want to send to the notebook, you can also make use of colab features to send data directly to Google Sheets. The setups below walk though the process of using the Pandas library to analyze some of Google Colab’s California Housing sample data, and send the results to Google Sheets. Details are also in this sample notebook.
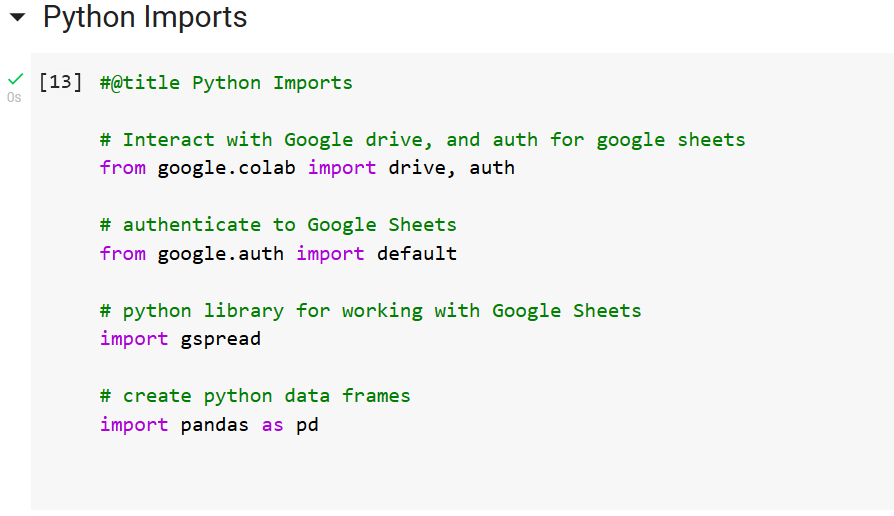
pandas and google.cloab libraries. You can use the #@title ... nomenclature to title a Python code cell in your Notebook. These will appear in the table of contents allowing you to jump around your notebook.
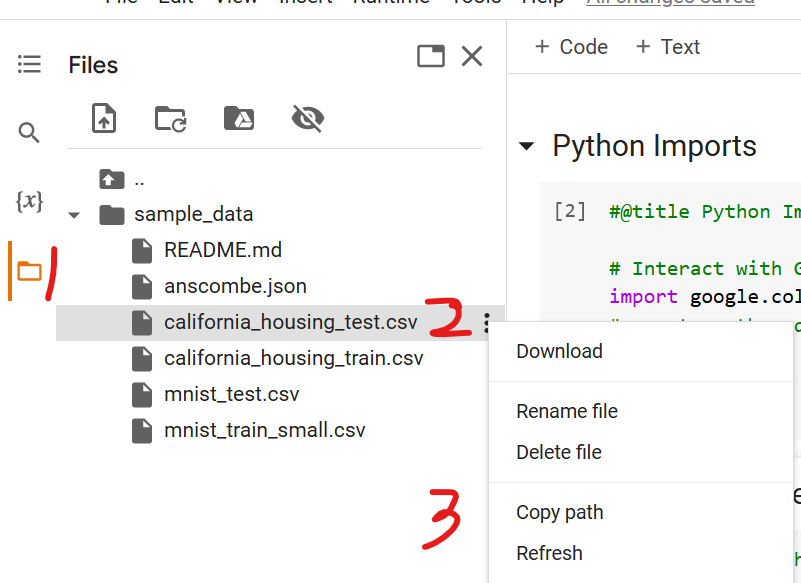
colab library access the sample data. To access the path for an item in Google Drive open the file browser (1), navigate to the file and click the three dot menu (2), then select “copy path” (3)
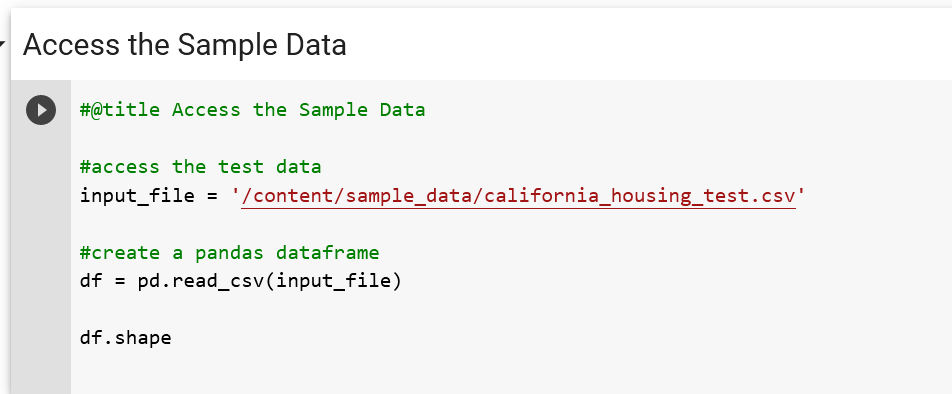
df.shape method to see this data has 3000 rows and 9 columns

gspread to create a new spreadsheet and worksheet to the size of your data. then using worksheet.update put the data into Google Sheets
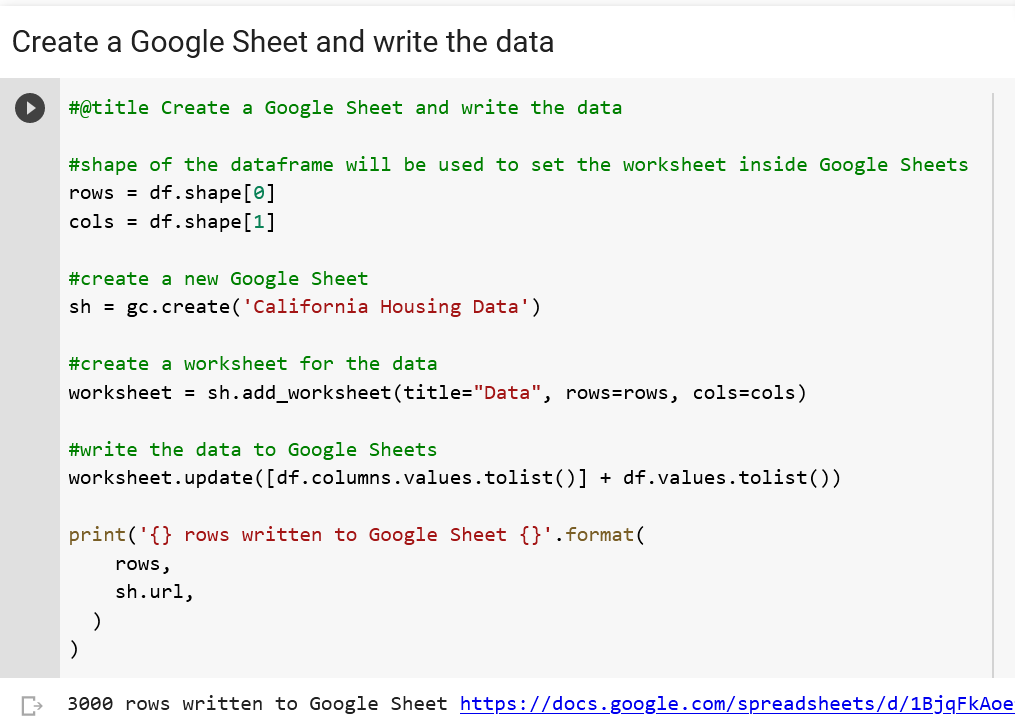
This will have your data into Google Sheets but the one line of worksheet.update([df.columns.values.tolist()] + df.values.tolist()) is doing a lot. How did this data actually get written.
The worksheet.update method takes in a list of data as the values attribute. If the elements of this list are themselves lists gspread will send this data as rows and columns to write to the sheet. For example if your data is data = [[1,1],[2,1],[3,1]] when this is written to Google Sheets it will be written as three rows, with two columns each
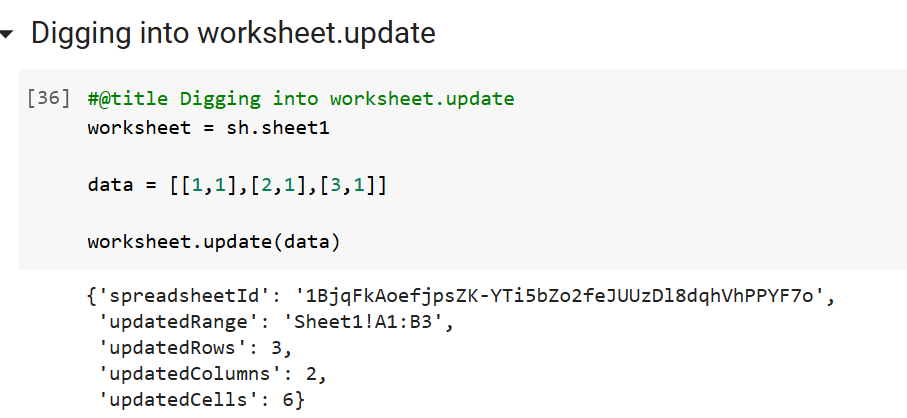
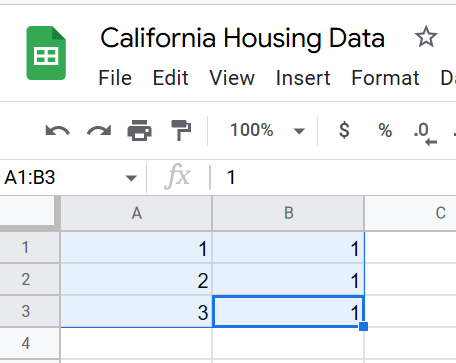
With this information we can keep diving into how worksheet.update([df.columns.values.tolist()] + df.values.tolist()) wrote our data to Google Sheets. df.columns.values.tolist() calls the columns attribute from the Pandas Dataframe. This is then converted to a list using tolist(). In order to have our list of lists as above this list is included inside of [ ] inside the worksheet.update. If this were the only data sent to Google Sheets it would only write the column names
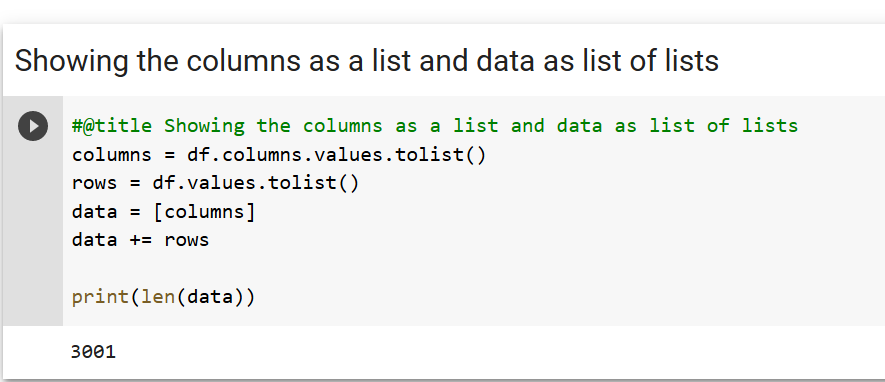
To get each of the remaining 3000 rows of data df.values.tolist() is used to export the Dataframe’s data to a list. This is then added to the column names list using the add operator. When this add operation is complete we have a list with 3001 elements, each of which is a row to write to Google Sheets.
This example only wrote the Dataframe directly to Google Sheets. However, you can use these same basics to write the output of any of your data analysis Dataframes or series to Google Sheets. You can also use gspread to update existing worksheets, or create multiple sheets for each of the answers you produce.
If you are logging into Atlassian with your Microsoft/Google account and want to set a password you need to unlink it. To do so you need to change your email...
My appearance on Episode 26 of the Modern Cyber podcast with Jeremy Snyder of FireTail.io was recorded at the fwd:cloudsec US 2024 conference
Original post on Zatik Blog
Original post on Zatik’s blog
Your iPhone can be a blackhole of attention. One way to reduce the amount of screentime you spend on it is to make the screen less appealing to look at. You ...
Jupyter Lab notebooks are a great tool for doing data analysis that is either to big for Excel, or you need to repeat the output. Google Colab is a hosted v...
The first post in this series covered creating a site with Pelican the second covered S3 hosting and Github Actions. The series will conclude with configurat...
With the static site already created you could manually copy these files to S3 via the AWS console, or via the S3 CLI. However, this adds friction to the wri...
The site here is built using Pelican which is a static website generator. It allowed you to write webpages in markdown, then build them along with a config f...
I wanted to get started with writing more online in 2022. I decided to setup a static site hosted out of S3 which I will cover in a future post. However, bef...